
I am a podcaster, producer, and musician, here to assist you on every step of your creative venture.
Feeling overwhelmed by the technical requirements of podcasting? Let’s simplify things…
First things first
As of 2022, there are over 2 million podcasts on the internet, and this rapid increase has also led to a rise in new products to record podcasts. This is great news for the industry, but can be very overwhelming for folks who are just getting started. So I’ve designed this guide with simplicity in mind. I am not going to teach you everything there is to know about audio technology. I am going to help you find what you need for your own unique situation. To that end, this page will feel a little like a “choose your own adventure novel” where you will click on your needs and find answers for you. Feel free to read the whole article if you want to learn a few things about what is out there, but you don’t need to!
No matter what your situation is, there are three things that every podcaster needs…
1. A microphone (which we will talk about in the next section)
2. A “pop-shield” that sits a few inches from your microphone and stops those annoying, breathy “p” and “t” sounds. This is absolutely essential and will make an enormous difference in your recording quality. I’ve been using this one for the past five years, and it has held up beautifully despite only costing $13.
Dragonpad Microphone Pop Filter

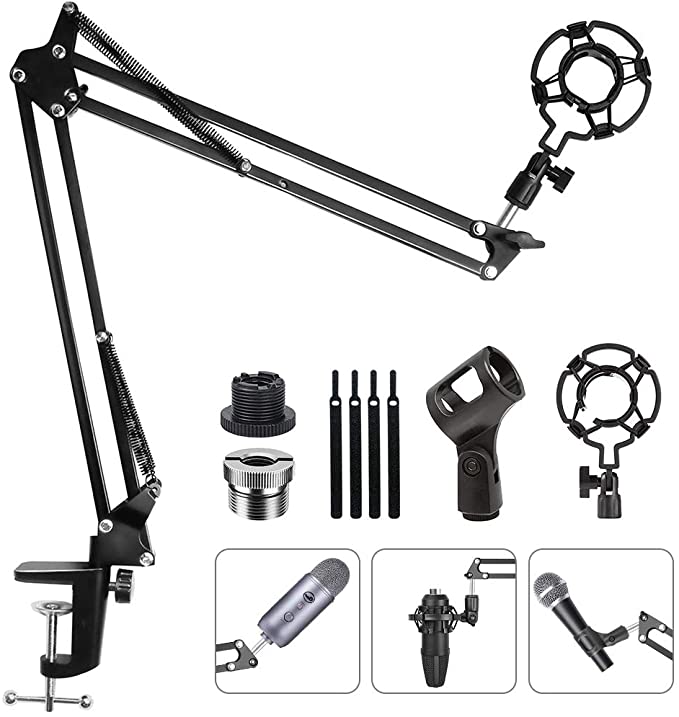
3. A microphone stand. If you’re recording at a desk, I would recommend something like this adjustable arm that clamps onto your desk. It keeps your desk clear and helps reduce accidental bumps while recording. This one is only $20, and honestly, there’s not a big enough jump in quality with the really nice ones to justify spending much more.
Adjustable Microphone Suspension Boom Arm
Where Should I Record?
Anywhere can become a podcasting studio if you know what to look out for! Find somewhere relatively quiet and comfortable where you won’t be distracted. Most of the time that I hear bad recordings, the main problem is reverb. You’ve probably heard it too. You know when the person sounds like they are recording in a cathedral? That’s reverb. It’s amazing how a room sounds totally normal until you start recording, and then it’s echo city! What you are hearing is your voice bouncing off of flat, solid surfaces. Bare walls, hardwood floors, and straight lines will cause reverb. A simple trick is to snap your finger loudly and listen for reverb. If you hear it, there are a few simple fixes.
- Get an area rug.
- Put some art on the walls (extra points if they have thick frames or unique shapes).
- Buy a few cheap moving blankets and hang them up near you while you record. These are the blankets I used to treat the inside of my podcast studio.
- During the beginning of the COVID lockdown, many radio hosts made blanket forts at home so they could host remotely and keep that studio sound.
- If you want to be extra fancy, you can buy a shadow box frame, stuff it with foam, and put art on the front. Everyone will think it’s just a picture, and they will have no idea that it’s really absorbing sound!
Finding the Right Microphone
Your needs will dictate my microphone suggestions, but there are a few overall suggestions and terms that we need to talk about first.
There are two main types of microphones: condenser microphones and dynamic microphones. For our purposes, it will be enough to say that condenser mics are a lot more sensitive and pick up more sound. Normally, that’s what you would want in a vocal mic, but I’m guessing that you aren’t recording in a sound-proof studio which means that in addition to your voice, it will also pick up your cat’s meows, the car outside, and your kids yelling downstairs. For that reason, I have found that dynamic microphones are almost always the better option for podcasters. You will need to stay closer to them, but you the end result will be much cleaner.
Nearly all microphones use either XLR or USB connectors. XLR microphones are your traditional mics that plug into soundboards and recording interfaces while USB mics connect directly to your computer. A few of the mics I suggest have both!
When you are recording, try to stay about one hand’s width away from the microphone. Personally, I have found that the best placement of the mic is angled at about 45 degrees with the mic head right at chin level. Imagine that you are speaking directly over the mic. This will help reduce harsh “p” and “t” sounds and will increase the low-end quality of your voice as it picks up more from your neck and chest.

“Choose Your Own Adventure”
Now comes the fun part. Let’s find the perfect equipment for your podcast in your price range!
When you record your podcast, will you be the only person in the room (solo podcast or co-host/guest joining online)?
Recording Alone
Congratulations, you have the easiest setup options!
If you are recording alone, then you should be using a USB microphone that connects directly to a computer. There is no extra equipment to buy, nothing to set up, and you can use it for live-streaming and Zoom calls too. However, for all the convenience, the only downside is that you can only use one microphone at a time. If you try to plug two USB mics into the same computer, you will probably end up with timing issues between the tracks that leads to the audio being out of sync. If you decide to change to a multi-mic system, you will need a few more pieces.
I’ve divided the following microphones into various price brackets. I have used them all, and have found these to be the best USB mics for podcasting. As you increase in price, you will also increase in quality. If you can afford a better mic, you should definitely splurge. The difference in quality is definitely noticeable and will make you sound more professional.
Under $100
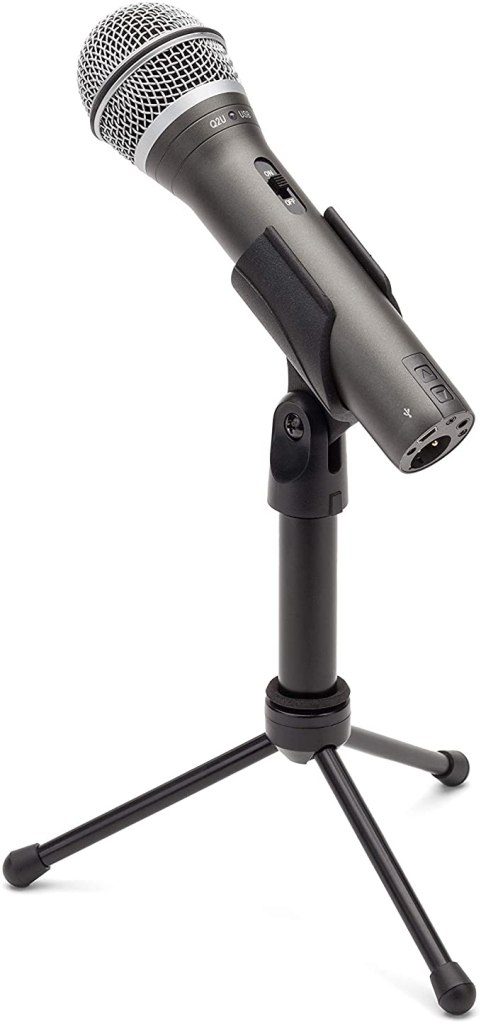
This is my go-to suggestion for people who are just starting out in podcasting. It’s under $100, sounds good, has a sturdy build, and features both XLR and USB connections. That means that if you ever decide to expand your setup to include multiple mics, you can just add this to the new setup. Make sure that you are using a pop-shield (as you always should) with this one though, as it will definitely pick up a lot of breathy “p” and “t” sounds.
$100-$200
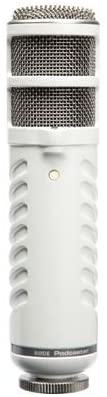
The Rode Podcaster is such a wonderfully sturdy mic. You can just feel it when you pick it up. It does an excellent job of picking up only what is right in front of it and ignoring the ambient noises in your room. I have used the XLR version as my main microphone for several years because I love the depth of sound I get from it.
$200-$300

For 50 years, the broadcast industry has been enamored with the Shure SM7B. It is the absolute gold standard of broadcast microphones, but at $500, it’s pretty inaccessible to the average podcaster.
So recently, Shure took the design of its legendary SM7B and compressed it into a more affordable USB version called the MV7. Like the first mic on our list, it has both USB and XLR, so it can be used for multiple applications as your needs change. The sound is rich and deep while the built in EQ and volume control make it a breeze to use.
I’ve seen people use this mic without a pop-shield, and while the built in fluffy windbreaker does a good job of stopping most breathy noises, it’s still a good idea to use one if you can.
Click here for the conclusion and final resources.
Recording with Others
So you and your friends are planning to record together in the same room. That’s great! It’s much easier to play off each other in person than recording online. If you can manage it in your space, try to face each other instead of sitting next to each other. Dynamic mics are designed to reject sounds coming from behind them, and you will get a much cleaner vocal signal that way.
Now, in order to record multiple mics at once, we’re going to need a few extra pieces. Since you cannot plug multiple USB mics into the same computer, we will need a few XLR microphones and an interface to plug them into.
For the interface, you have two options.
- A USB computer interface (record onto the computer)
- A dedicated digital recorder (record onto an SD card)
For most applications, I would recommend a dedicated digital recorder because portability gives you more flexibility, and you don’t need to worry about breaking your expensive laptop.
The only time I would recommend a USB interface is if you are going to be doing live-streaming or recording music. Then you might want the ability to record multiple inputs directly into your computer.
Dedicated Digital Recorder
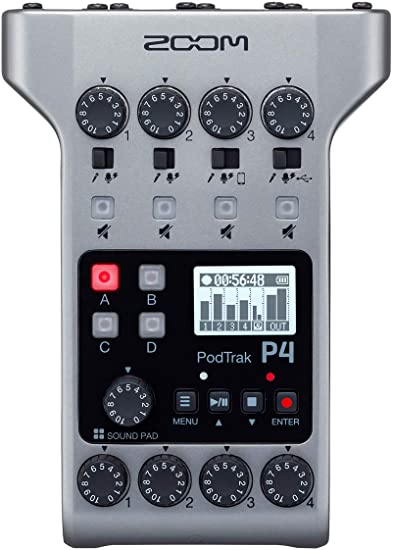
I’ll make this simple, and only give you one suggestion. As far as dedicated audio recorders go, there is simple nothing out there that does what the PodTrak P4 does, especially at this price range. It records four channels of audio as well as a fifth for a live soundboard if you’re ever doing a live show. There are also four headphone jacks and four dedicated volume knobs for them. That means that you can record four people at once, each with their own headphones, and control the volume for each person. For the advanced user, you can use the PodTrak to interface with a computer or phone to record remote guests and act as a digital interface for live-streaming. I’ve used the PodTrak to record podcasts, record choirs, live stream on Facebook, and act as a USB interface with my computer. Seriously. I love this thing.
USB Computer Interfaces
Under $200
Behringer U-PHORIA UMC404HD Audiophile 4×4

Behringer has carved out a nice niche for itself, creating affordable and reliable musical equipment, and that is exactly what you get. It lacks the bells and whistles of more expensive units, but if you are looking to just record no-frills audio, then this will do it. It is made of plastic, but doesn’t “feel” cheap. It takes a little bit of work to make all four channels work correctly on some computers, but there are plenty of tutorials on their website and even on the Amazon listing to help you out.
Over $200
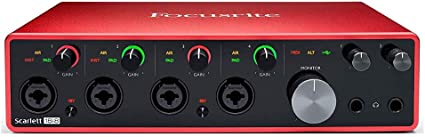
The Focusrite Scarlett line is the industry standard for podcasters, and the interface that I have used for many years. It has a metal body that is tough and reflects the quality of the unit. The “air” mode is an analogue circuit built in to the device that makes your vocals shine. I always leave it on. Technically, this unit has eight inputs, but only the front four are for microphones. The back four are used for instruments. If you only need inputs for two microphones, you can buy the Scarlett 4i4 for half the price.
XLR Microphones
Under $100
This is my go-to suggestion for people who are just starting out in podcasting. It’s under $100, sounds good, has a sturdy build, and features both XLR and USB connections. That means that if you are on the go, you can use this with your computer without a dedicated USB interface. Make sure that you are using a pop-shield (as you always should) with this one though, as it will definitely pick up a lot of breathy “p” and “t” sounds.
$100-$200

The Rode Procaster is my go-to microphone. I use this microphone to record my podcast, live-streams, music, and anything that needs recording. It has a dynamic, broad range that brings out the depth of the spoken word. It is a solid, metal build that just “feels” good. I have been so impressed by how well it rejects noise behind it too. There is a dehumidifier about 15 feet in front of where I record, and I don’t hear it at all on my recordings.
$200-$300
For 50 years, the broadcast industry has been enamored with the Shure SM7B. It is the absolute gold standard of broadcast microphones, but at $500, it’s pretty inaccessible to the average podcaster.
So recently, Shure took the design of its legendary SM7B and compressed it into a more affordable USB/XLR version called the MV7. Like the first mic on our list, it has both USB and XLR, so it can be used for multiple applications as your needs change. The sound is rich and deep while the built in EQ and volume control make it a breeze to use.
I’ve seen people use this mic without a pop-shield, and while the built in fluffy windbreaker does a good job of stopping most breathy noises, it’s still a good idea to use one if you can.
$300-$400
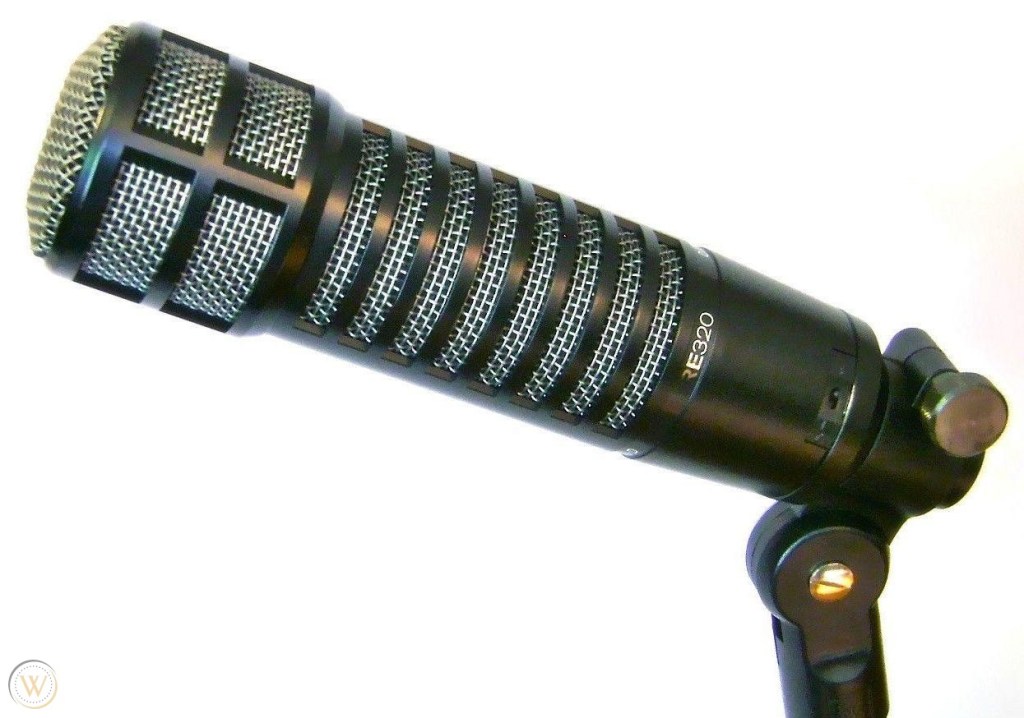
The Electro-Voice RE320 is the little brother of the legendary RE20, designed for podcasters and radio hosts. It is clear, punchy, and dynamic, featuring a strong low-end response. If you are looking for a mic that has that low, booming NPR sound, then you should check this out. Compared to the Shure and Rode mics on this list, the Electro-Voice definitely picks up more ambient noise, so if you are recording in a noisy room (fans, children, trains, etc.), then you will probably hear them. If you are in a reasonably quiet space, then it won’t matter either way.
Over $400
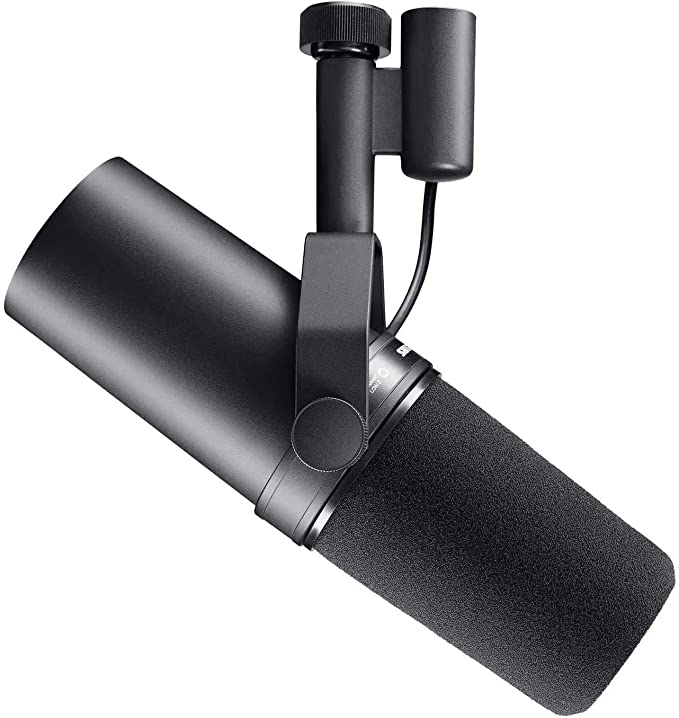
There’s no denying the impact that the Shure SM7B has had on the industry. It’s a legendary microphone for vocals (both sung and spoken), and is the only mic on this list that doesn’t require the use of a pop-shield. It’s been the go-to mic for Marc Maron, Joe Rogan, The Foo Fighters, and Michael Jackson (to name a few). The MSRP is $500, but you can often find them for $400. The only thing to keep in mind is that since the microphone element is so deeply placed, the signal tends to be low. If you cannot get the volume high enough without it “hissing”, you will need to buy a separate in-line preamp like the Cloudlifter (which I use and love) for an extra $150.
Conclusion
I hope that you found this tutorial helpful. Once you have your recording equipment ready, make sure you check out my other tutorial on how to craft a professional podcast episode.
If you have any questions or would like a free personal consultation, please contact me at zachus@gmail.com. I am also available for editing services and continued support. Click on the link below to book editing and publishing services. Happy podcasting!